John Deere 1020 & 301A Engine Oil Specifications, Service Intervals, Parts List
The original service specification provided by John Deere recommends that the engine oil and oil filter be replaced at 200 hour intervals. However, due to the age of the John Deere 1020 and 301A models in service, we recommend replacing the engine oil and engine oil filter at 100 hour intervals to combat fuel dilution, blow-by contamination, and other conditions that cause more rapid breakdown of the engine oil. See subsection below oil viscosity chart for synthetic oil recommendations. John Deere 1020 and 301A models powered by the 2.5L 3 cylinder diesel have an oil capacity of 6 quarts (with filter change).
John Deere 2.5L Diesel Viscosity Chart
Oil Viscosity |
Ambient Temperature Range |
Notes/Remarks |
SAE 40 |
68° F to 122° F |
Required in extremely hot weather conditions |
SAE 30 |
32° F to 104° F |
Recommended within temperature range; good all-around oil above freezing |
SAE 15W-40 |
8° F to 104° F |
Recommend within temperature range; good all-around oil, widely available viscosity |
SAE 15W-30 |
8° F to 86° F |
Suitable within temperature range; not preferred over 15W-40 due to narrower operating temperature range |
SAE 10W |
-12° F to 50° F |
Suitable within temperature range; not preferred over 5W-30 due to narrower operating temperature range |
SAE 5W-30 |
-32° F to 50° F |
Suitable within temperature range; recommended cold weather oil |
SAE 5W-20 |
-32° F to 26° F |
Suitable within temperature range; not preferred over 5W-30 due to narrower operating temperature range |
John Deere 1020/301A Diesel Oil Recommendations
Amsoil 15W-40 Heavy Duty synthetic diesel oil
Superior protection for hard working equipment
- recommended general purpose engine oil
Amsoil 15W-40 TBN 12 Heavy Duty synthetic diesel oil
A high TBN synthetic engine oil designed to provide superior protection for aging engines - recommended for engines with high hours and/or excessive blow-by, oil consumption, or fuel dilution
Amsoil 5W-30 Max Duty Synthetic Diesel Oil
Superior protection for hard working equipment - recommended cold weather engine oil
Amsoil full synthetic engine oils offer:
• Superior protection against fuel dilution, oil consumption, and blow-by contamination
• Superior resilience against thermal, mechanical, and chemical breakdown of engine oil
• Improved oil flow and engine protection in sub-zero temperatures
• Greater protection for equipment that is stored for long periods of time or operated infrequently
Amsoil is a leading manufacturer of synthetic oils and lubricants, including a line of engine oils engineered to meet the demands specific to diesel engines
John Deere 1020 & 301A Oil Change Parts List
Part Description |
Part Number(s) |
Remarks/Notes |
Engine oil filter |
--- |
|
Oil pan drain plug |
--- |
|
Oil pan drain plug gasket |
[1] |
|
Oil fill neck cap |
--- |
|
Oil fill neck cap gasket |
--- |
|
Oil fill neck |
--- |
|
Oil fill neck flange gasket |
--- |
|
Engine oil level indicator (dipstick) |
--- |
[1] Aluminum crush washer type gasket. Approximate dimensions are 29/32 inch ID, 1-3/16 inch OD, 1/16 inch thickness. Recommend replacement at least every other oil change to prevent leaks.
John Deere 1020, 301A Oil Change Procedures
Note that the tractor shown is an industrial 301A model, but the procedures are familiar for 1020 farm tractors equipped with the 2.5L 3 cylinder diesel. Recommend allowing engine to sit OFF for at least 30 minutes before servicing to allow engine oil to cool and drain into the crankcase.
Click any thumbnail to view fullsize, detailed image
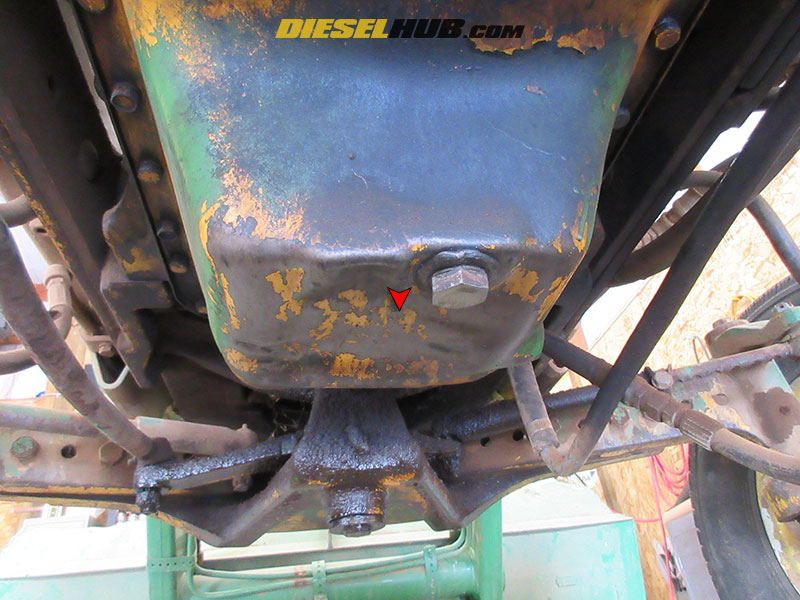
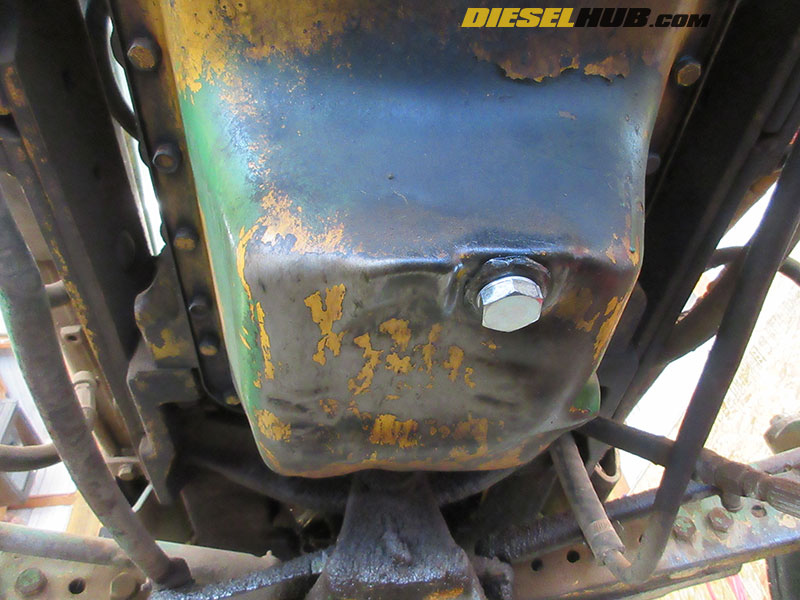
• Place a suitable container below the engine oil pan drain plug to collect oil as it drains (minimum 6 quart capacity, recommend larger).

• Remove the engine oil pan drain plug with a 1-1/8 in socket or box end wrench and allow the engine oil to begin draining.
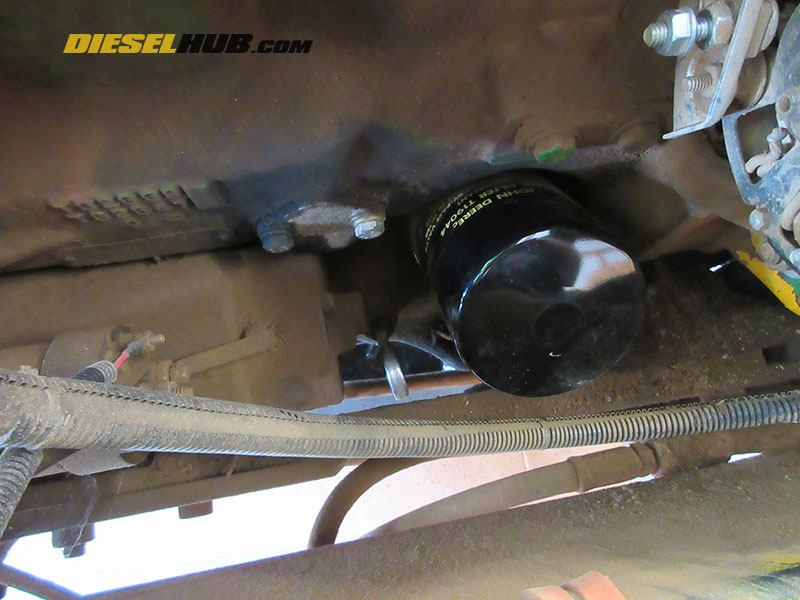
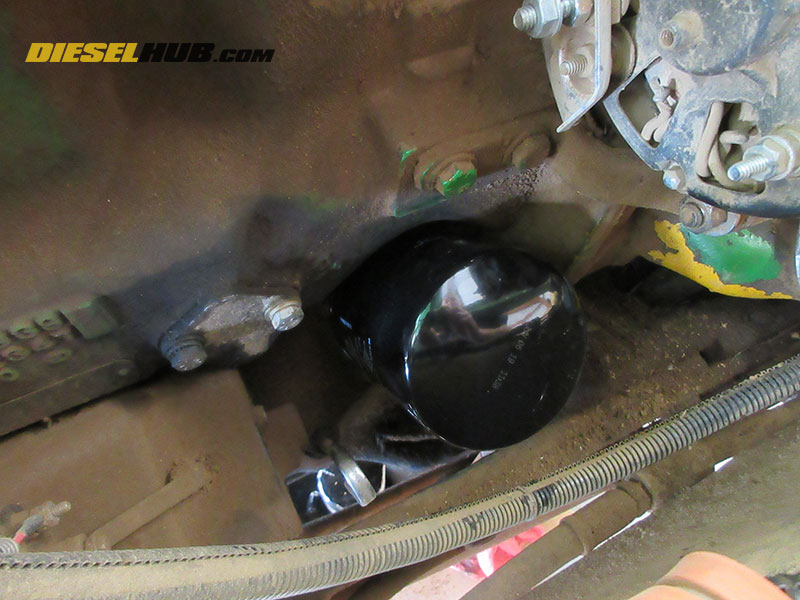
• While the engine oil is draining, locate the oil filter. It is positioned in front of the starter motor on the right side of the engine, next to the fuel pump and engine oil dipstick (note that this engine has been converted to an electric fuel pump, thus the original mechanical pump is missing).
• Remove the oil filter by rotating counter counterclockwise. It may difficult to grip the oil filter due to the position of the fuel pump in the engine block, but a large pair of channel locks or oil filter wrench can aid in breaking the seal loose.
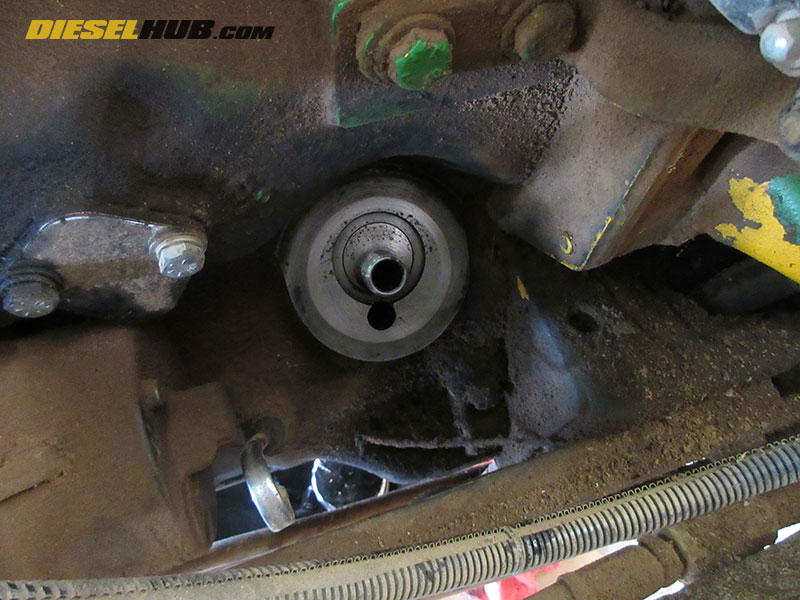
• Clean the oil filter base thoroughly with a clean, lint free shop towel and verify that there are no remnants of the old oil filter gasket stuck to the flange.
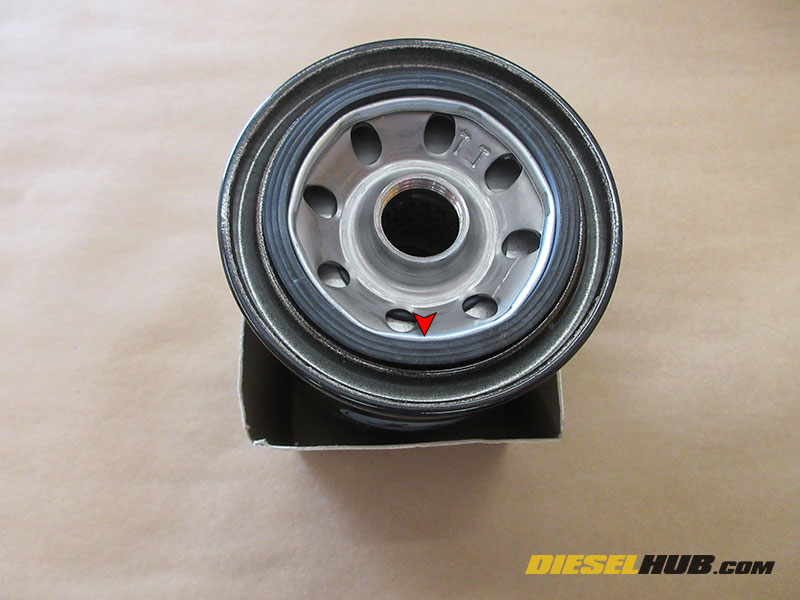
• Generously lubricate the gasket/seal on the replacement oil filter using clean motor oil.
• Install the replacement oil filter in reverse order. Once the oil filter gasket contacts the base, rotate the filter an additional 3/4 to 1-1/4 turns to ensure that the gasket mates snug against the base. The oil filter should only be tightened by hand.

• Clean the engine oil pan drain plug/gasket thoroughly and inspect there condition. The drain plug/gasket should be replaced as necessary if either is found to be damaged. Note the stripped threads on the old drain plug (right) in the image; it was obviously not reused.
• The drain plug gasket is a crush-type aluminum washer and should only be reused a few times before being replaced, as it will have a tendency to leak as it deforms from use.
• Reinstall the engine oil pan drain plug and torque snug; do not overtighten. Clean any residual oil around the plug so that leaks can be easily detected.
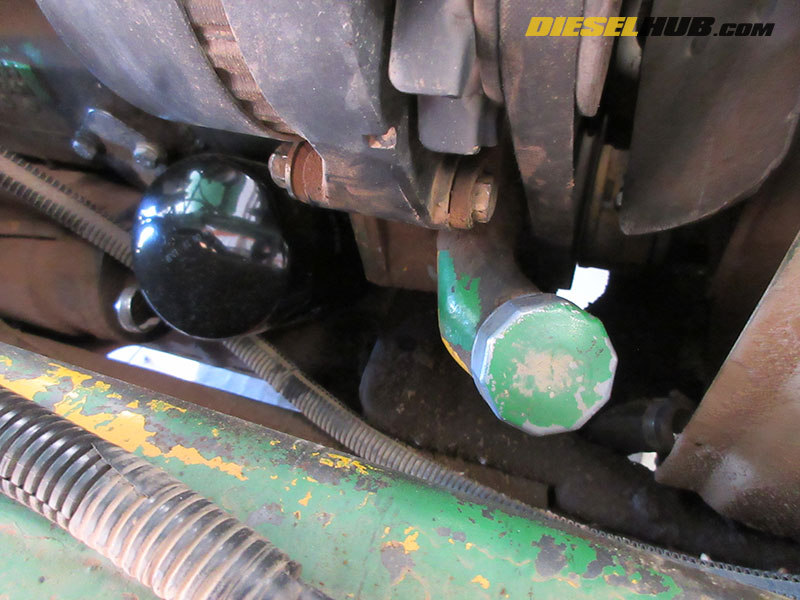
• Locate the oil fill tube (filler neck) on the right side of the engine, in front of the oil filter and below the alternator.

• Remove the oil fill tube cap and place a funnel in the tube.
• Add 6 quarts of new motor oil through the fill tube.
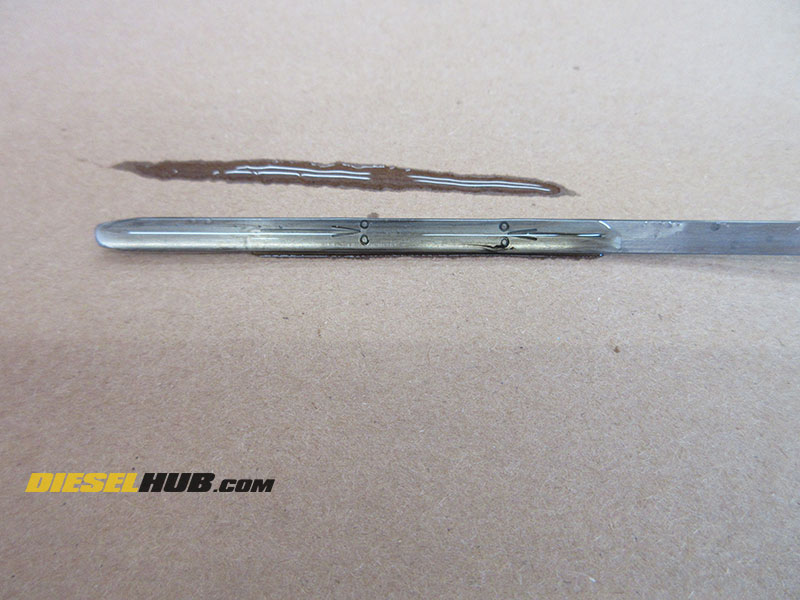
• Verify the crankcase oil level on the engine oil dipstick. Note that the oil level is above the indicator marks because the oil filter is currently empty and thus the crankcase is holding slightly more oil.
• Start the engine and allow to run for 3 to 5 minutes while you check for leaks around the oil filter and oil pan drain plug, then shut the engine off.
• Recheck oil level after engine has sat for 5 to 10 minutes. Adjust oil level and address leaks as necessary.