The bushings and pedal box assembly on 92+ model year Ford pickups is more robust than that of previous model years - the frame of the pedal assembly is steel instead of aluminum and the bushings are significantly more durable. This does mean that the bushings never wear, they're just less problematic. During this process, do not neglect to inspect the bushing where the clutch pedal swing arm connects to the master cylinder pushrod, as this is a more common issue. We highly recommend performing the Heim Joint Mod to eliminate concerns associated with the plastic clutch master cylinder rod eye bushing wearing.
Clutch Pedal Bushing Replacement Parts List
Part Description |
Part Number(s) |
Remarks/Notes |
Heim joint mod (pushrod bushing eliminator) |
[1] |
|
1992 - 1997 clutch & brake pedal bushing set |
--- |
|
1992 - 1997 clutch & brake pedal assembly |
--- |
|
1987 - 1997 clutch master cylinder pushrod bushing |
--- |
|
1987 - 1997 clutch rod swing arm |
[2] |
[1] Recommended modification, eliminates the failure-prone clutch master cylinder pushrod bushing and replaces it with a non-wearing rod end or "heim joint". This upgrade is optional, but is installed in the procedures below.
[3] May be reused, however it is better to replace.
Clutch Pedal Bushing Replacement Procedures
The following procedures are applicable to 1992 - 1997 model year pickups. For earlier model years, please see: 1987 - 1991 Clutch Pedal Bushing Replacement.
Click any thumbnail image to view fullsize
• For safety, disconnect both negative battery cables so that the vehicle cannot be started.
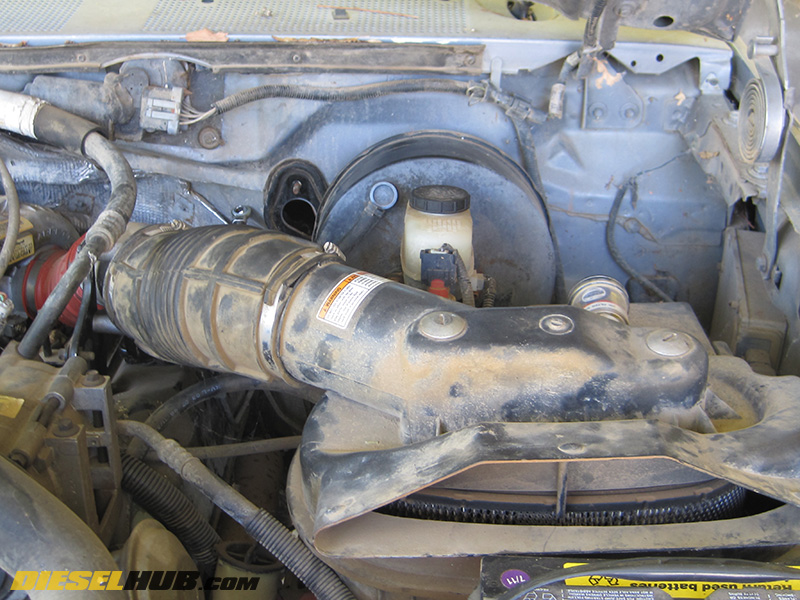
• Remove the air intake pipe tubing and air filter box to make room to work. Cover the turbocharger inlet pipe with a rag so that debris cannot enter (do not forget to remove this rag when you're done).
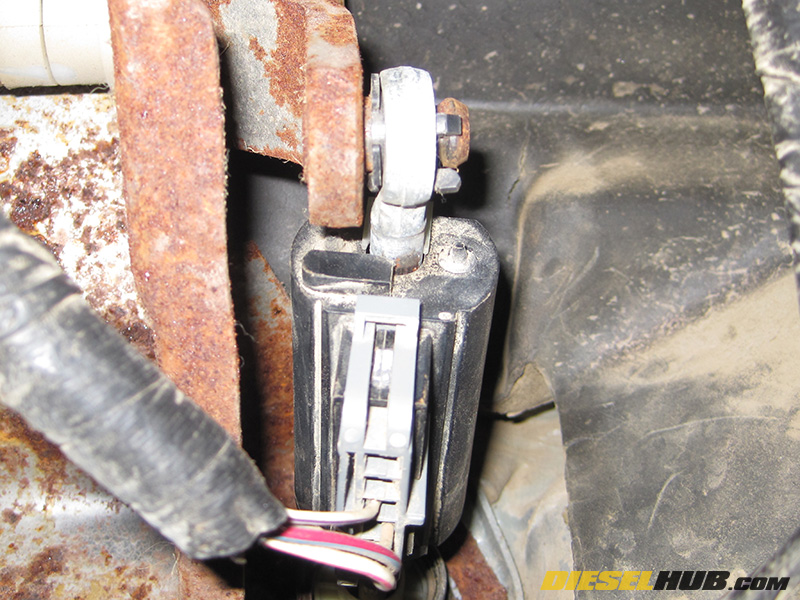
• Disconnect the clutch engagement switch connector; tuck it under the dash and out of the way.
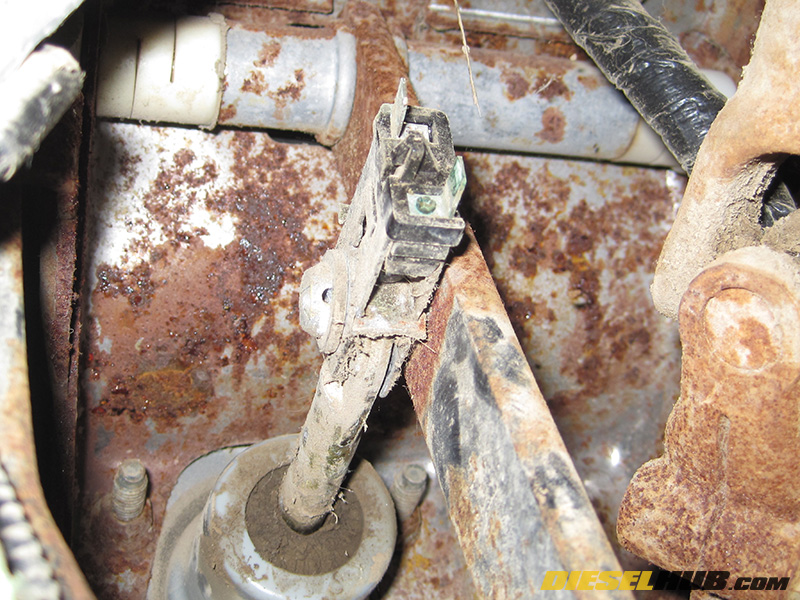
• Pry the eye of the clutch master cylinder off of the clutch swing arm pin.

• Follow the hydraulic line from the clutch master cylinder down towards the slave cylinder and disconnect any retaining clips. DO NOT disconnect the line from either the clutch master or slave cylinder - you're simply pulling the line out of any retaining clips so that it floats freely.

• Remove the two bolts mounting the clutch master cylinder to the firewall - the heads are 13 mm.

• With the retaining bolts removed and the switch disconnected, carefully pull the clutch master cylinder through the firewall and let it hang.
• If the plastic bushing in the pushrod eye is worn, replace it. Alternatively, consider the heim joint modification, which eliminates this bushing and improves clutch pedal feel.
• Disconnect the switch at the brake pedal/master cylinder connection, then remove the brake master cylinder pushrod from the brake pedal (1 spring clip). Do not lose the bushings located between the eye of the master cylinder pushrod and brake pedal assembly.

• Remove the four nuts around the brake master cylinder push rod that secure the pedal assembly and master cylinder to the firewall (9/16" socket).
• Gently pull the brake master cylinder away from the firewall until the studs are completely removed from the holes in the firewall. Let the brake master cylinder hang freely.

• Remove the single bolt on the upper end of the steering shaft (closest to the steering wheel) with a 13 mm socket. Separate the shaft from the steering wheel shaft, push it in towards the front of the truck, and let it hang.

• Locate and remove the two bolts at the top of the pedal assembly bracket (pedal box) with a 10 mm socket - a long extension helps reach them.
• Tug, wiggle, and pull on the pedal assembly to remove it. Because the clutch master cylinder studs go through the firewall, it will be VERY tight. If necessary, gently tap the studs through the firewall with a dead blow hammer. Once the studs are through, rotate (wrestle) the pedal assembly 90 degrees clockwise to remove it. Be mindful of electrical wire/harness locations while you're pulling as not to cause any damage.
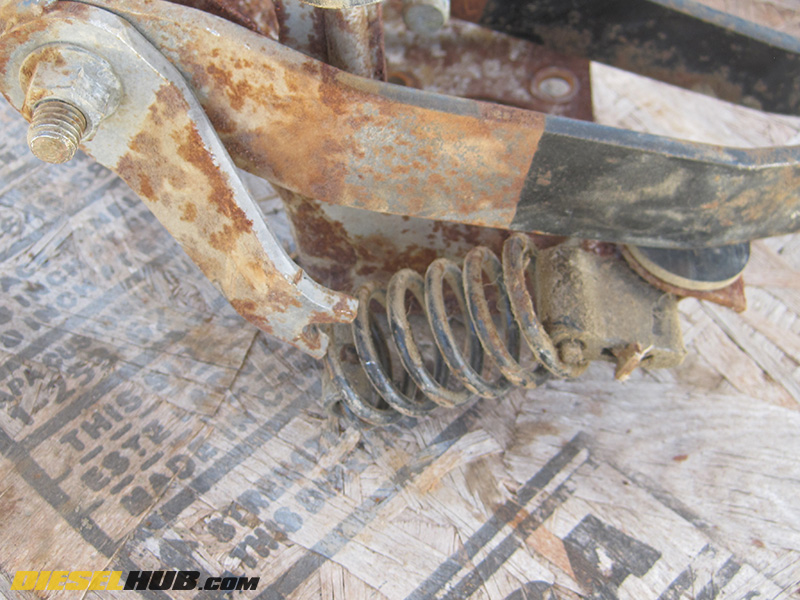
• With the pedal box assembly on a bench, use channel locks to carefully compress the clutch pedal spring and slip it off the lever arm such that there is no longer any tension on the clutch pedal.
• The clutch swing arm is located on the right side of the assembly (opposite side as the clutch pedal). Remove the 18mm bolt holding it place, then pry off the swing arm with a pry bar, large screwdriver, and/or vice grips. It will be very tight.

• Slide the clutch pedal and rod out towards the left hand side of the pedal box and replace the bushings one-by-one as you slide the rod back in place. Use a liberal amount of grease on all pivot points and bushings.
• Once the new bushings have been installed, set the new clutch swing arm in place and attach, but do not tighten, the 18mm nut. You may re-used the old swing arm, but purchasing a new one is preferred. The swing arm should rotate freely 360 degrees on the shaft at this point.
• Reinstall the pedal assembly, brake master cylinder, clutch master cylinder, steering shaft, brake pedal to master cylinder, and all electrical connections. Threadlocker should be used on the steering shaft bolt. The final step is to align and secure the clutch pedal swing arm.
Note - Proper alignment of the clutch rod swing arm is imperative during re-installation. The swing arm comes from the factory without splines and they are cut by the teeth on the pivot shaft during installation.
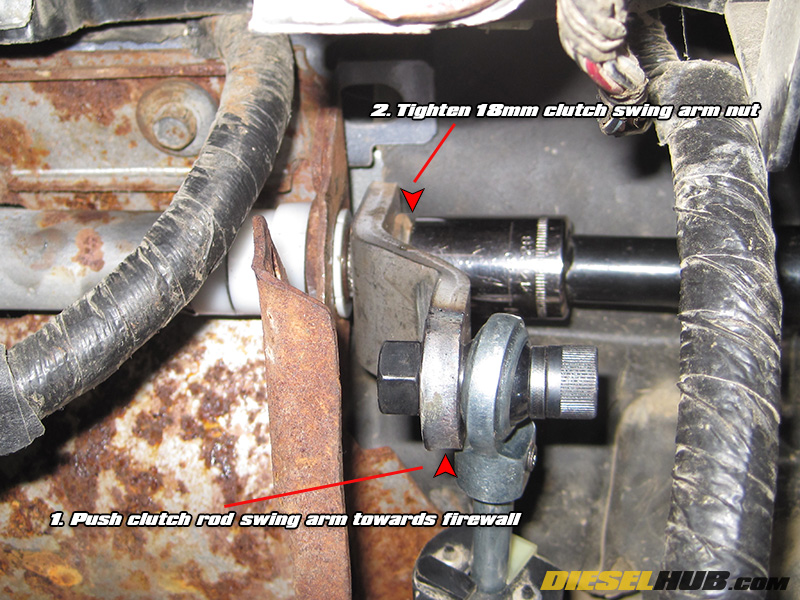
• Install the clutch master cylinder pushrod to the swing arm (note - pushrod in picture has received the "heim joint mod". Now is the perfect time to consider this modification).
• With the clutch pedal in the up position (clutch pedal NOT depressed), push the clutch master cylinder pushrod in towards the firewall until all slack in the throw of the pushrod is removed. Tighten down the 18mm clutch swing arm nut completely while holding tension on the pushrod towards the firewall.