The Garrett GT3788VA is a variable geometry turbocharger found in 2004 LLY through 2016 model year 6.6L Duramax diesels. A series of mechanical "vanes" in the turbocharger control the flow of exhaust gases across the turbine wheel, maximizing turbocharger performance at low speeds while protecting from over-boost conditions at higher speeds by taking the place of a traditional wastegate.
When a turbocharger's VGT system becomes mechanically stuck or seized, the corresponding effects on performance depend on the position in which the vanes stick; fully open vanes will cause the turbocharger to build pressure slowly, hindering low end performance. Vanes that stick in the fully closed position provide good spooling characteristics off-idle, but with excessive exhaust back-pressure at higher engine speeds and the potential for an over-boost/over-speed condition. In reality, the vanes tend to freeze somewhere in-between the open and closed positions, causing poor overall performance characteristics, excessive turbo lag, and noticeable exhaust smoke under load. Since the turbocharger is coming apart, we recommend new bearings and seals in addition to a thorough cleaning and reassembly with anti-seize; see 6.6L Duramax GT3788VA turbo rebuild procedures after the turbocharger has been descaled and cleaned.
Part & Tool List
Part Description |
Part Number(s) |
Remarks |
Unison ring, Garrett GT3788VA |
[1] |
|
VGT vane, Garrett GT3788VA |
[2] |
|
3M Roloc arbor |
[3] |
|
3M Roloc conditioning discs |
[4] |
|
High temperature anti-seize lubricant |
ACDelco 10-4039 |
[5] |
[1] - The 6.6L Duramax and 6.0L Power Stroke employ a similar turbocharger model that uses an identical unison ring; at time of publishing, the GM part number was unavailable, but the Ford part was readily available. The Ford and GM parts are simply re-packaged Garrett turbo parts. Unison ring can be descaled, cleaned, and reused unless it is bent.
[2] - Sold as a complete set of vanes. Vanes can be descaled, cleaned, and reused if there is no physical damage.
[3] - Standard 1/4 inch shank fits any pneumatic or electric rotary tool with a 1/4 inch arbor; can be chucked in a drill motor.
[4] - Or equivalent conditioning discs; the 3M Roloc product line has been the industry standard for descaling turbocharger parts. Do NOT use harsh abrasives, sandpaper, or any alternative that will remove metal during use.
[5] - A HIGH TEMPERATURE anti-seize lubricant must be used; all listed products are rated for 2,400 degrees F.
How to Clean & Descale a VGT Turbocharger that is Seized
Click any thumbnail to view fullsize, detailed image
• It is highly recommended that a conditioning disc (3M Roloc 07480 has become the industry standard) be used in lieu of sand paper or other harsh abrasives. The Roloc discs will remove soot, scale, oil, and other buildup without damaging the base material.
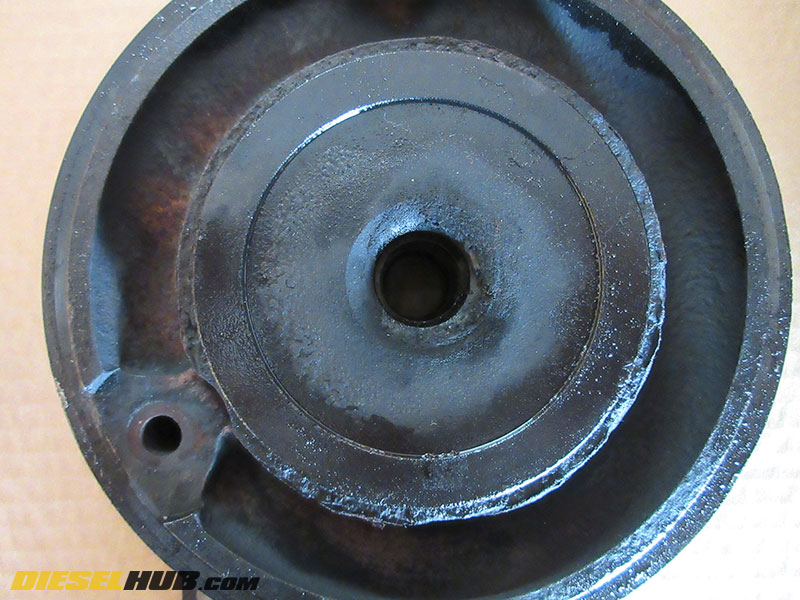
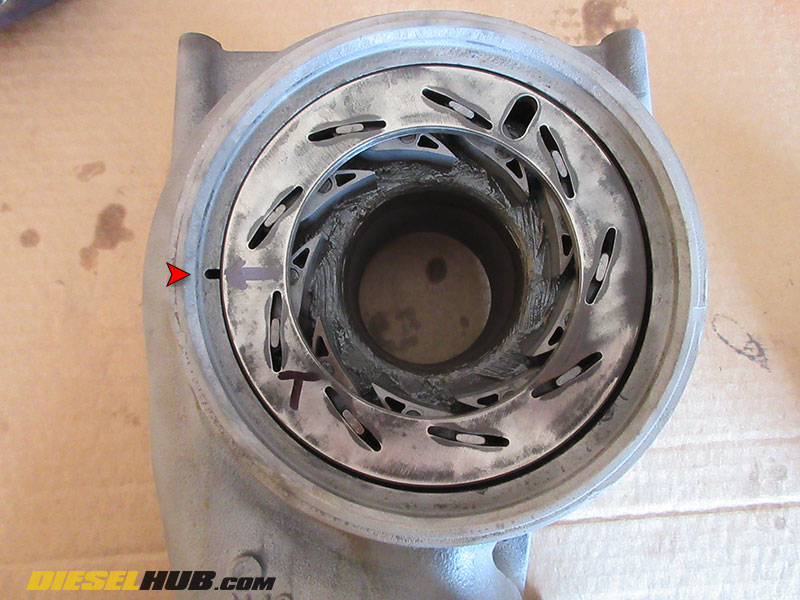
• Use conditioning discs to thoroughly clean the face of the bearing housing (turbine side), removing all buildup from the mating surfaces. Pay careful attention to the contact area between the unison ring and the housing as this is commonly where the unison ring becomes stuck.
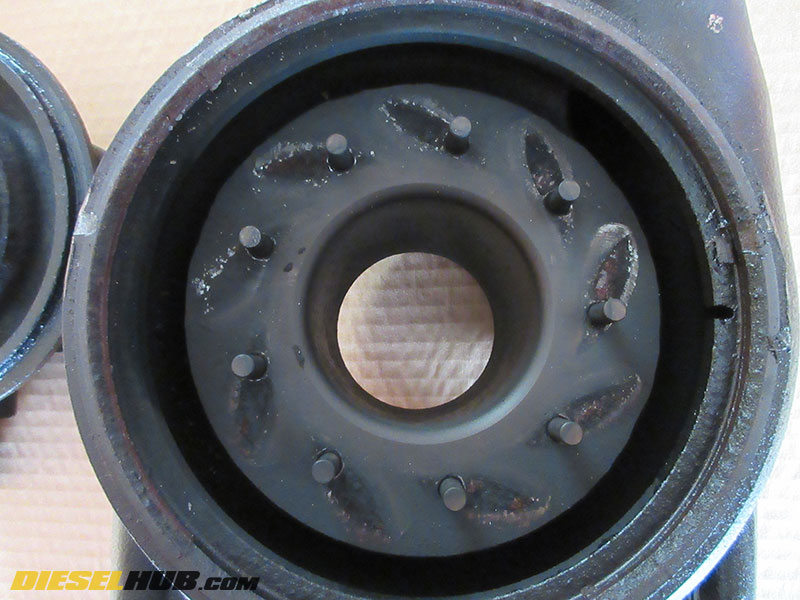
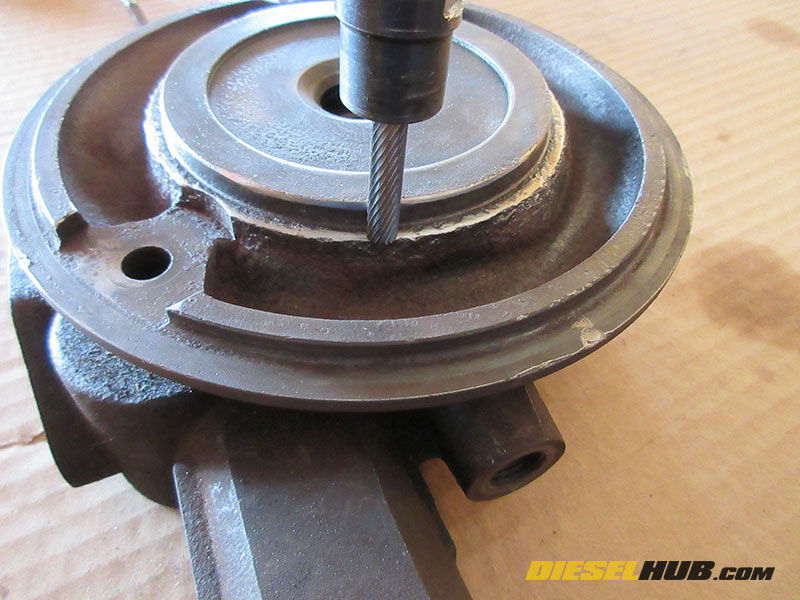
• Use conditioning discs to thoroughly clean the contact area between the turbine housing and the individual VGT vanes. This area should be clean and smooth when finished so that the vanes move freely.
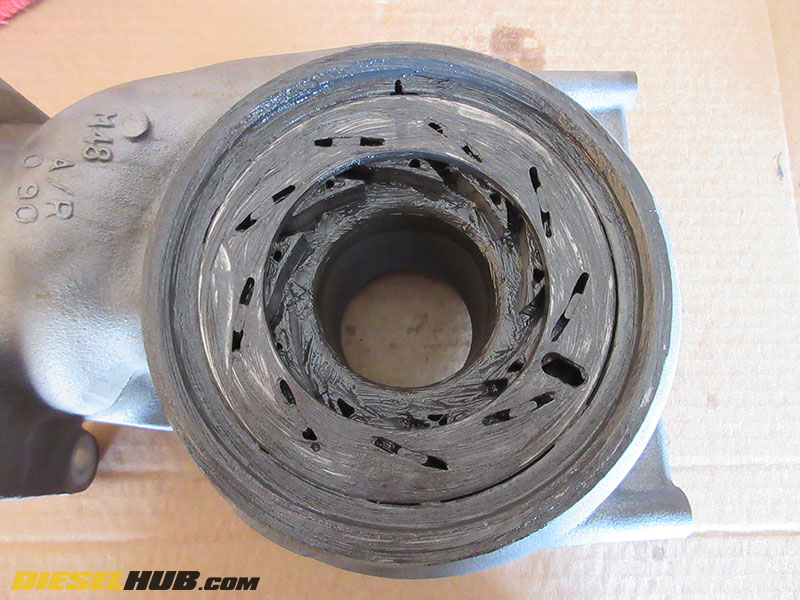
• Clean the flange where the bearing housing attaches to the turbine housing so that the two components mate easily during reassembly.
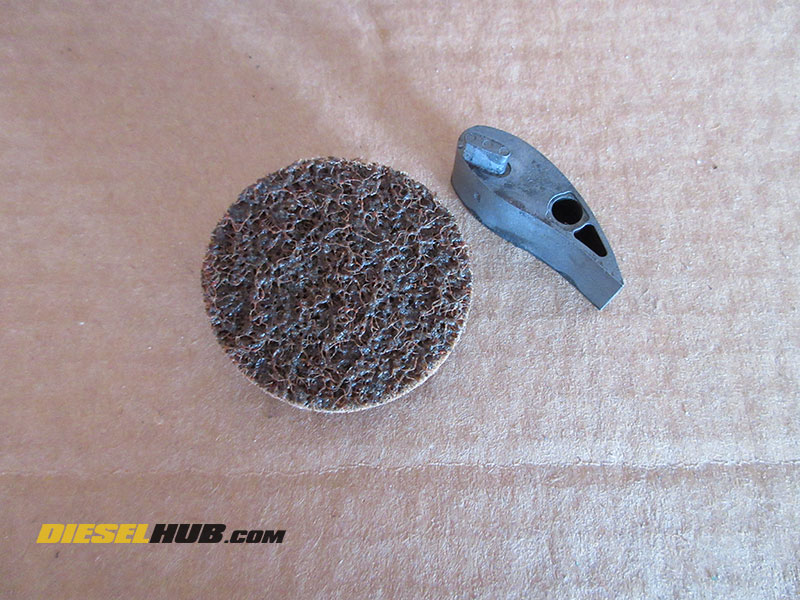
• Thoroughly clean each individual VGT vane with conditioning discs. 3M Roloc conditioning disc and cleaned VGT vane pictured.
• Thoroughly clean the unison ring.
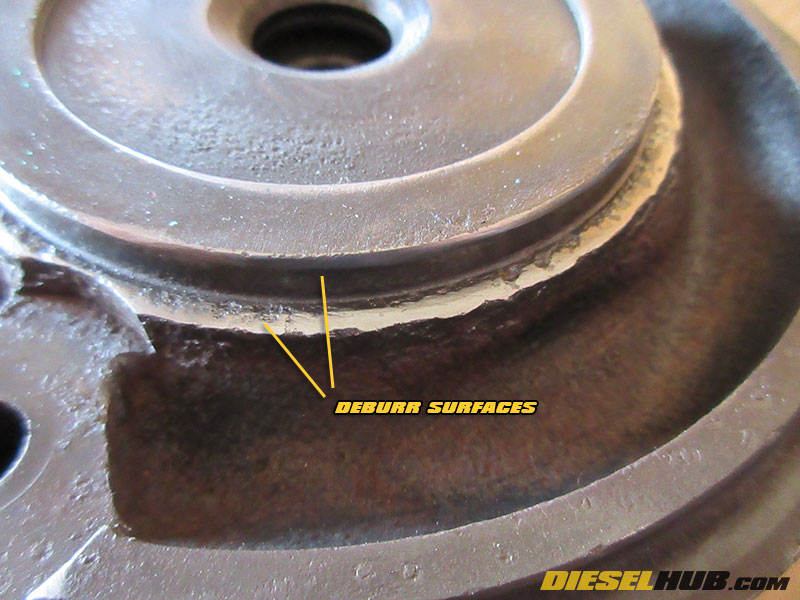
• Once all components have been cleaned with a conditioning disc, you may need to deburr the unison ring contact surface. The most common cause of a malfunctioning VGT system is the unison ring becoming stuck at this surface.
• A common bur tool can be used to finish cleaning the contact ring.
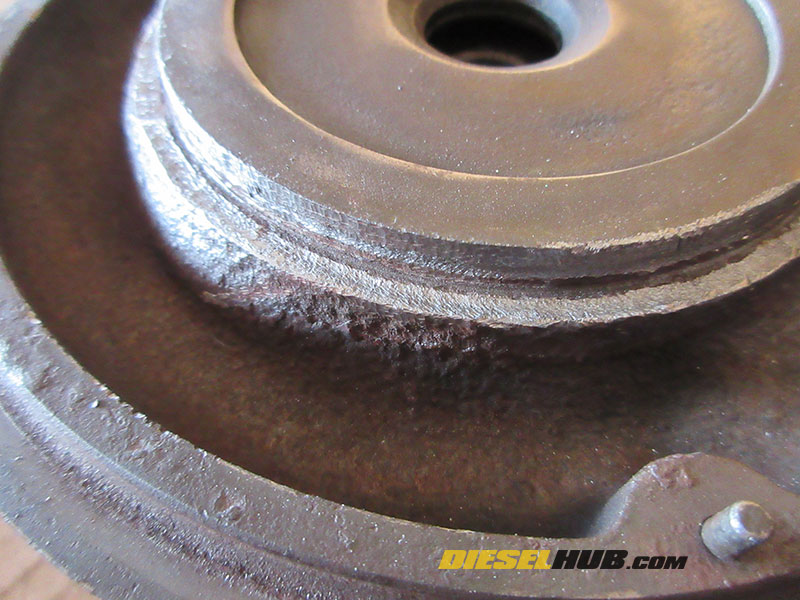
• Deburr/grind/condition the contact area (vertical and horizontal surfaces) until the unison ring rotates freely when installed in the bearing housing.
Duramax Turbocharger Unison Ring, VGT Vane Indexing & Installation
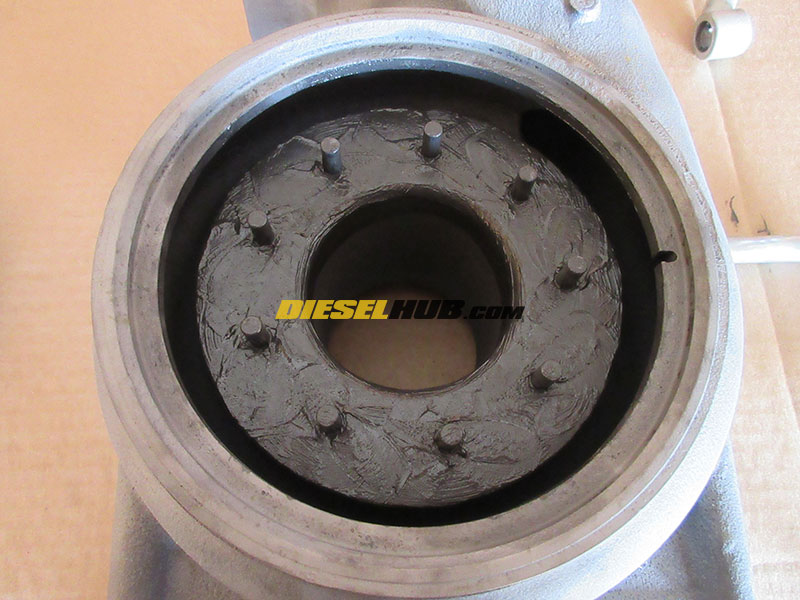
• Apply a liberal coating of high temperature anti-seize to the turbine housing where the VGT vanes sit.

• Install all VGT vanes on their respective pins in the turbine housing.
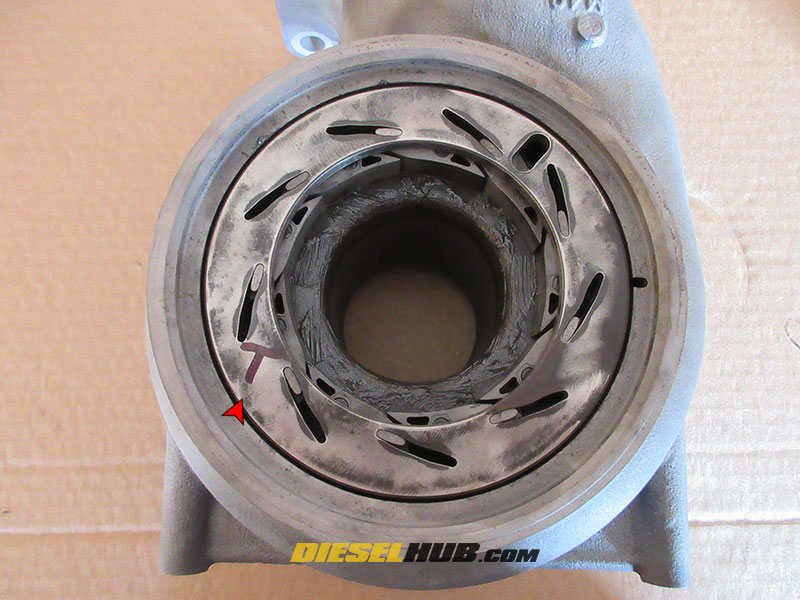
• Now it's time to index the unison ring (find and mark its proper location within the turbine housing).
• Install the unison ring onto the VGT vane assembly. You'll need to manipulate the vanes so that they line up in the unison ring slots properly. The unison ring can only installed one way, i.e. it will not fit upside down.
• Once the unison ring has been installed, mark the surface with a "T" for top.
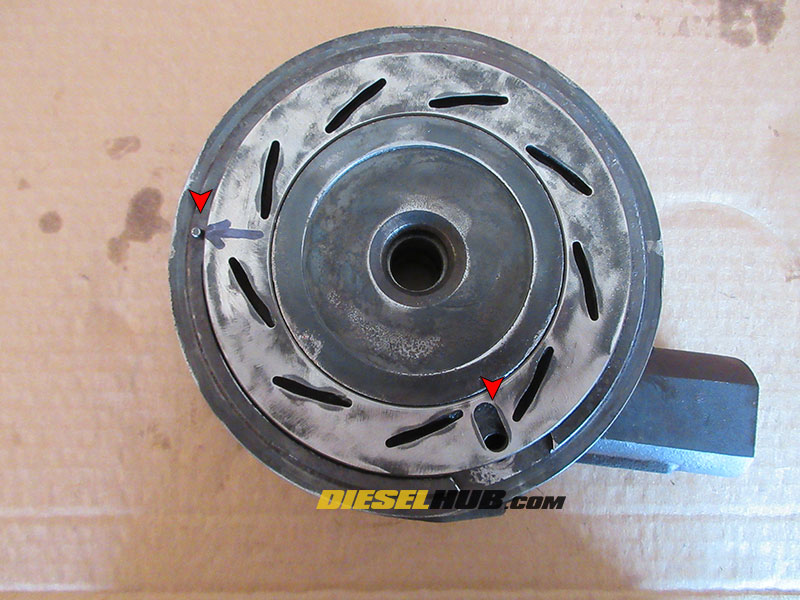
• Remove the unison ring from the turbine housing and install it on the bearing housing with the "T" facing downwards so that you cannot see it.
• Rotate the unison ring so that the actuator slot (slotted hole for the armature that controls the movement of the ring) is properly centered with the armature pin (if you have removed the armature, line it up with the respective hole in the bearing housing).
• On the unison ring, mark the position of the dowel pin used to align the bearing and turbine housings. Transfer this mark to the top of the unison ring.
• Lightly coat the bottom side of the unison ring with high temperature anti-seize. Reinstall the unison ring onto the VGT vane assembly in the turbine housing, lining up the mark from the previous step with the small notch in the turbine housing used to align the bearing and turbine housings.
• The unison ring is now indexed and installed in the correct orientation with respect to the rest of the VGT system.
• Lightly coat the top of the unison ring and the turbine housing flange (mating surfaces between the turbine and bearing housings) with high temperature anti-seize.
• Set the turbine housing aside in a clean place.
For complete turbocharger reassembly procedures, see: 6.6L Duramax turbo rebuild guide
Page Information
Last update: 12/7/2021
Copyright: Diesel Hub (dieselhub.com), all rights reserved
Disclaimer(s): Vehicle diagnostic and repair procedures may place participants in a situation that poses severe risk of injury; always adhere to proper safety guidelines, ensure any applicable safeguards are in place, and wear appropriate PPE when working on or around a vehicle.