Caution - Do not attempt to service/repair the master cylinder if you lack experience with and/or knowledge of vehicle braking systems. Improperly repaired items may result in vehicle damage, personal injury, or death. Seek the help of a professional if you lack the tools or do not fully understand the procedures for bleeding a typical automotive brake system.
1987-1991 Ford F-Series Master Cylinder Parts List
Part Description |
Part Number(s) |
Remarks/Notes |
Brake master cylinder, F-150 |
--- |
|
Brake master cylinder, F-250 under 7,000 lbs GVWR |
--- |
|
Brake master cylinder, F-250 over 7,000 lbs GVWR |
--- |
|
Brake master cylinder, F-350 single rear wheel |
Wagner MC120368 |
--- |
Brake master cylinder, F-350 dual rear wheel |
Wagner MC120368 |
--- |
Brake fluid, DOT 3 |
[1] |
|
Vacuum bleed tool |
[2] |
[1] All F-Series applicable to this article require DOT 3 brake fluid. Note that brake fluid types are not typically cross-compatible and should not be mixed. Use of an incompatible or contaminated brake fluid can negatively impact brake function.
[2] A vacuum pump is required to bleed the brake system using the method described herein. The listed Mity-Vac product is a reasonably priced, highly versatile repair and diagnostic tool with both pressure and vacuum functions.
How to Replace the Brake Master Cylinder on a 1987 - 1991 Ford F-Series
Click any thumbnail to view fullsize, detailed image
• Disconnect the negative battery cable(s).
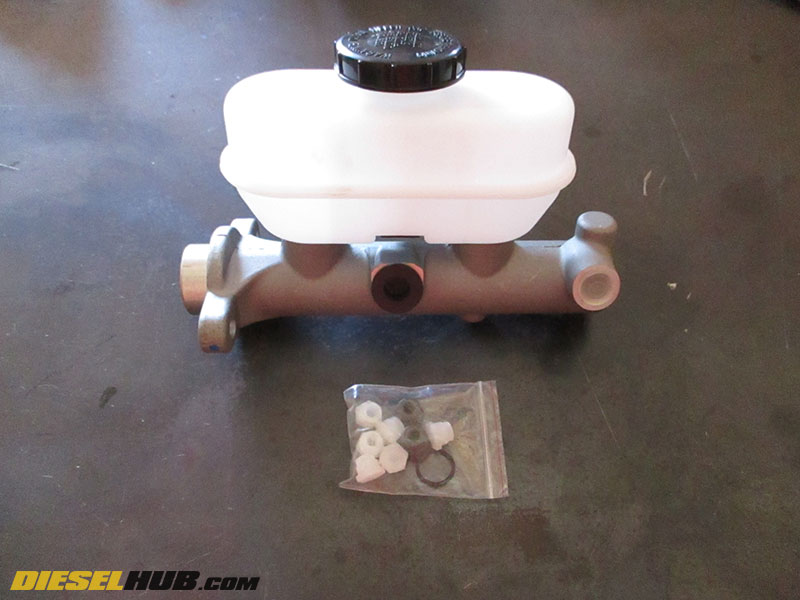
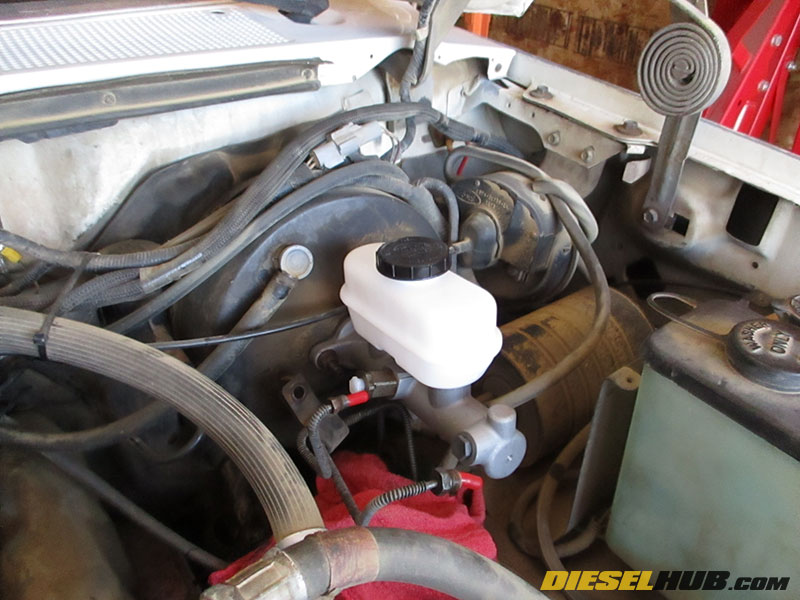
• The new cylinder [hopefully] included a replacement seal for the master cylinder check valve in addition to a series of plugs, which will reduce spillage of brake fluid when the brake lines are removed (ACDelco replacement cylinder shown).

• Remove the nut for the brake line bracket on the brake booster stud (9/16" socket/wrench). Position it so that the brake lines will float loosely once they are disconnected from the brake master cylinder.
• Optional - use a suction gun or similar tool to drain the master cylinder reservoir as much as possible.
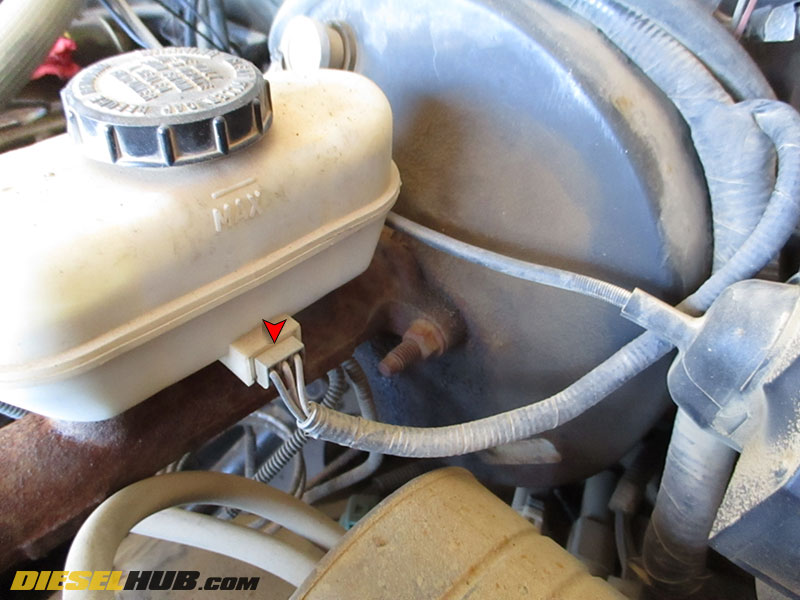
• Disconnect the electrical connector from the sensor on the brake fluid reservoir. The detent is located on the bottom of the connector and must be released before the connector can be unplugged.

• Place several shop rags/towels below the master cylinder.
• Remove the large brake line from the master cylinder using a 5/8" flare nut wrench. Plug the line using a vacuum line plug or equivalent. Plug the master cylinder port using one of the supplied plugs.
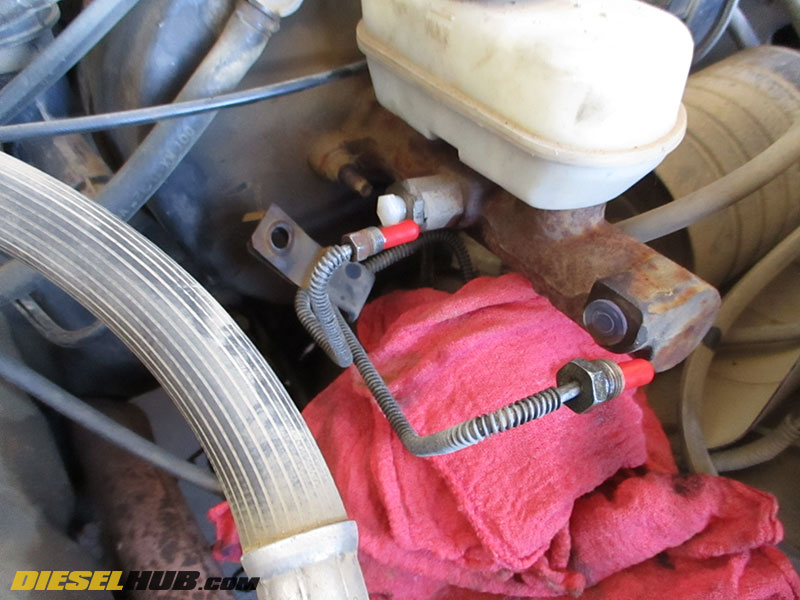
• Remove the small brake line from the master cylinder using a 7/16" flare nut wrench. Plug the line using a vacuum line plug or equivalent. Plug the master cylinder port using on the supplied plugs.
• Be cautious not to kink the brake lines when handling them.
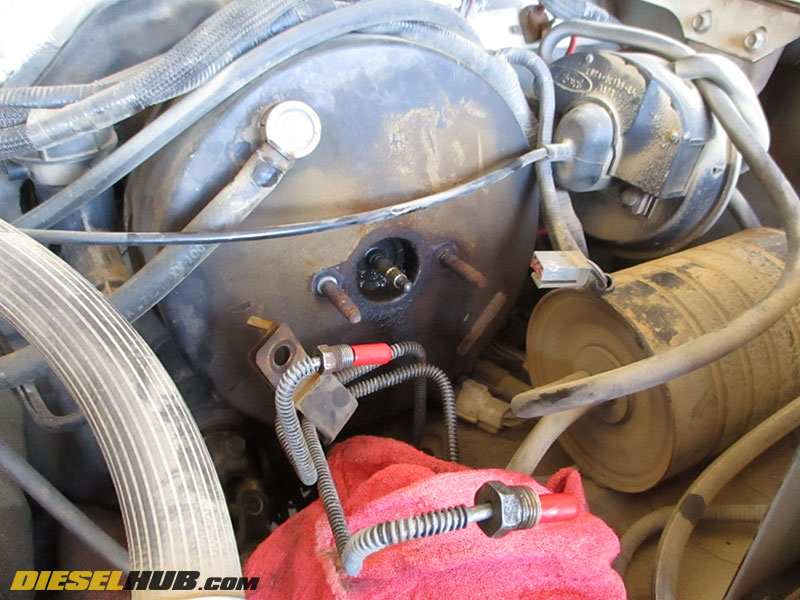
• Once the brake lines have been disconnected and plugged, remove the master cylinder. It is secured on two studs attached to the brake booster; (1) on the driver side and (1) on the passenger side. A 9/16" socket/wrench is required to remove the (2) nuts.
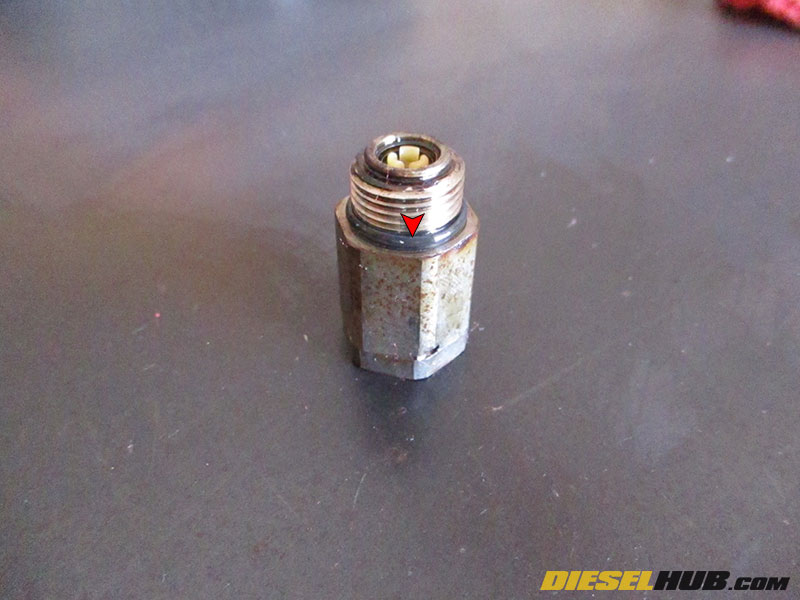
• Remove the check valve from the old master cylinder using a 7/8" wrench. Remove and discard the o-ring seal, then install the replacement seal.
• Install the check valve on the replacement master cylinder after lightly coating the o-ring seal with clean brake fluid.
• Install the replacement master cylinder to the brake booster. It is recommended, but entirely optional to use anti-seize lubricant on these bolts. Secure nuts down tightly.

You're going to need a brake bleeding tool for subsequent procedures. We highly recommend the Mity-Vac MV8500, which comes complete with various fittings, hoses, accessories, and is packaged neatly in its own molded storage case. It is selectable between pressure and vacuum, making it suitable for a wide range of diagnostic and repair functions (brake systems, wastegate actuator tests, vacuum system troubleshooting, etc).
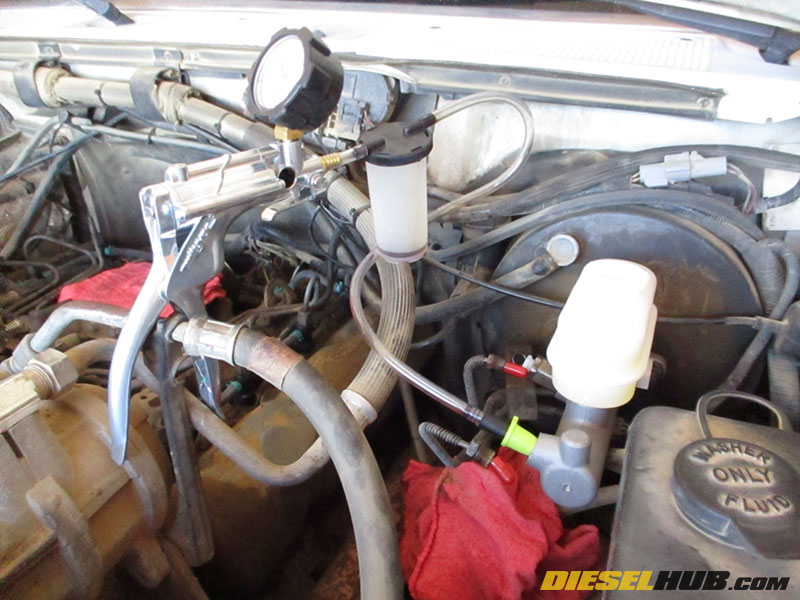
• Fill the master cylinder reservoir to the fill line, then use a vacuum pump/brake bleed tool to bleed each master cylinder port. This is done by using the appropriate fitting(s) and drawing brake fluid through each port of the master cylinder. During the process, do NOT allow the reservoir to empty completely; add brake fluid as necessary.
Note - there are alternative methods for bench bleeding the master cylinder.

• Large bubbles in the bleed line represents air that is being drawn from the system. Continue to bleed each port until no air bubbles or only extremely small bubbles are present. Re-plug the ports once they are bled.
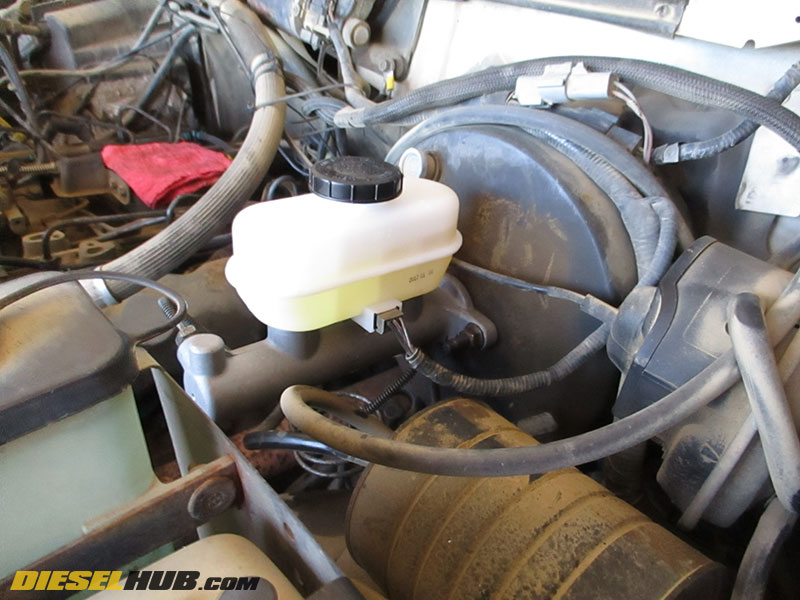
• Once the master cylinder is bled, reconnect the brake lines and master cylinder sensor connector. Reinstall the brake line bracket over the brake booster stud.
• Bleed the entire brake system in the following sequence: 1) passenger side rear brake, 2) driver side rear brake, 3) passenger side front brake, 4) driver side front brake. This can be performed by using the vacuum/bleed tool mentioned above, or with the help of a colleague. Monitor the brake fluid reservoir level during this process, as you will need to start over from step 1 if the reservoir is allowed to drain completely.
• Test brake system for proper operation. Bleed brake system again if necessary. Do not drive on public roads until the brake system is properly bled.